
It's been FOREVER since I've been here but it's because I've had to start working so things have been super crazy. Coming up to the end of summer means gearing up for holidays. I have a lot of things I'm going to be trying so I need to share them!
To begin my bestie came over with the ingredients for *wait for it* strawberry rhubarb pie! Only she brought along a big 6 muffin sized tin to make little pies *dies of happiness*. So she sliced the rhubarb and then I took over. She likes this kind of cooking and I like not having to figure out and find the ingredients. Basically we both win.
First the final product to lure you in:
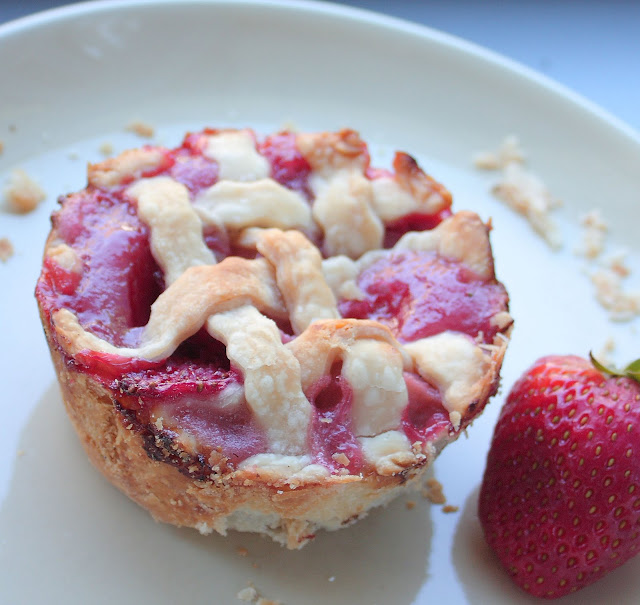 How cute is that? And completely scrumptious looking?
 I used a large cookie cutter to cut out the base for these morsels of goodness. Use pre-rolled pie crust to save on time and sanity. Be sure to grease and flour your tin to ensure these delicate pies pop right out of the tin.
 The pre-rolled crust comes in a package of two. One for bases and one for lattice! I used a crinkle cutter (Pampered Chef) and first quartered the dough and then cut strips. Use a flour and powdered sugar mixture to keep dough from sticking to the counter.
 The crinkle just gives the lattice that little extra special something. Gently pinch the lattice strip ends to the edge of the crust.

 Allow these to cool on a cooling rack. Why? When you place the tin on a flat surface the tin heats the counter and keeps the bottoms warm while the rest of the pie cools down. When you try to pop them out the bottom won't have set like the rest and will have a greater tendency to stack stuck to the bottom of the tin. That would be sad wouldn't it?
Ready for the recipe modified and simplified from allrecipes.com:
3 c. rhubarb sliced
3 c. strawberries quartered
1 c. sugar
1/2 c. all purpose flour
Dash of nutmeg
1 package pre-rolled pie crust
1. Mix rhubarb slices and strawberry quarters together with the sugar, flour, and nutmeg. Allow to sit for 30 minutes to fully combine.
2. While that is combining grease and flour tin. Use cookie cutter (or a LARGE glass) to cut out pie bases. Place pie base over well and gently press into tin (DO NOT PUSH INTO WALLS). Gently form the dough into the well.
3. Cut lattice strips but wait to pick up till pies are filled.
4. Fill pie crusts and then weave the lattice top
5. Bake at 325 for 10-15 minutes (crust will be golden and the filling will bubble).
Once they have FULLY cooled take a butter knife and run it along the edge to loosen up the pies. Then lay a cutting board over the tin and flip it over to pop the pies out. Carefully flip them over onto a platter, garnish, serve and enjoy!
See original recipe here
To begin my bestie came over with the ingredients for *wait for it* strawberry rhubarb pie! Only she brought along a big 6 muffin sized tin to make little pies *dies of happiness*. So she sliced the rhubarb and then I took over. She likes this kind of cooking and I like not having to figure out and find the ingredients. Basically we both win.
First the final product to lure you in:


Ready for the recipe modified and simplified from allrecipes.com:
3 c. rhubarb sliced
3 c. strawberries quartered
1 c. sugar
1/2 c. all purpose flour
Dash of nutmeg
1 package pre-rolled pie crust
1. Mix rhubarb slices and strawberry quarters together with the sugar, flour, and nutmeg. Allow to sit for 30 minutes to fully combine.
2. While that is combining grease and flour tin. Use cookie cutter (or a LARGE glass) to cut out pie bases. Place pie base over well and gently press into tin (DO NOT PUSH INTO WALLS). Gently form the dough into the well.
3. Cut lattice strips but wait to pick up till pies are filled.
4. Fill pie crusts and then weave the lattice top
5. Bake at 325 for 10-15 minutes (crust will be golden and the filling will bubble).
Once they have FULLY cooled take a butter knife and run it along the edge to loosen up the pies. Then lay a cutting board over the tin and flip it over to pop the pies out. Carefully flip them over onto a platter, garnish, serve and enjoy!
See original recipe here


